|
One of the biggest parts of photographers jobs isn't just taking the photos, they also have to edit them to their or their clients liking. One of the easiest ways to edit a photograph is to adjust the levels of the picture, that's what I'm here to explore today. Level adjusting allows the users to change where the brightest and darkest pixels are in a photo, this means that you can control the over shade of the picture whether you want it to be lighter or darker. The easiest way to adjust the levels is using the Level Slider in programs like GIMP (which is what I use and what I will be referring to) and Photoshop. In GIMP there are three parts of the Levels tool, Input Levels, Output Levels, and Auto Pick Levels. Input Levels shows where the darkest and lightest pixels are in the image and lets you use a slider to adjust where you'd like them to be. Output Levels control the range of levels in your final image. Finally the Auto Pick Levels Lets you manually drop in points to adjust you image. To demonstrate this technique I searched for poorly lit photos on Google and came up with a street with few lights. I brought the picture into GIMP and started to adjust the levels, I started with the Input Values, moving the middle slider closer to the left which made the picture slightly brighter. Then I moved the right slider closer to the left which darkened what I had done before but it was still brighter than what I started with. Then I moved down to the Output Values and only moved the left slider to the right which made the picture slightly brighter. Then I was finished and pretty pleased with the outcome. This skill seems very important for photo producers, so they can make final tweaks or pictures that they have taken and make them look better than before. This Was Before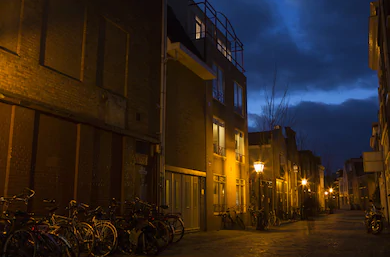 This Was After Summary:
0 Comments
As the school year comes to a close and we are right in the middle of exams I've been asked to reflect on my year in Digital Design and Animation 2. Overall my experience i this class this year has been great, we have learned so many interesting things in class this year not just about 3DS Max but skills that can be used for life. Some of my main takeaways this year have been, the importance of lights and cameras (I did an entire blog post on just that topic), animation, and learning new skills in 3DS like working with materials and different modifiers to make our models more realistic. Unit one was all about portfolio's and professionalism, we practiced creating resume’s and cover letters similar to what people would use to apply for job’s. We also focused on the importance of portfolio’s and it’s may uses, like ease of editing and accessibility. In unit two we begun working in 3DS Max and started with modeling techniques, for example compound objects using both surface and parametric modeling techniques and started working with parametric modifiers such as bend, taper, twist, etc. Materials, shaders, and rendering was the third unit of the year where we were introduced to the material editor and its functions like textures, shaders, maps, and UVW Mapping. Unit four was all about lighting, the different types of lights in 3DS like omni, Directional, and Area, as well as different techniques like 3 Point, accent, and daylight systems. Unit five was all cameras within 3DS. We learned things like the settings of physical cameras like shutter speed, ISO, and Field of View. We also learned the camera movements and shots like panning, dolly, eye level, low/high angle, etc. Unit six was primarily rigging and animation. We became very familiar with tools like the timeline and autokey, we had to learn how to create hierarchy's in correct orders by linking objects together, and we learned about CATRigs and Bipeds. Below is that summary with images from each unit. 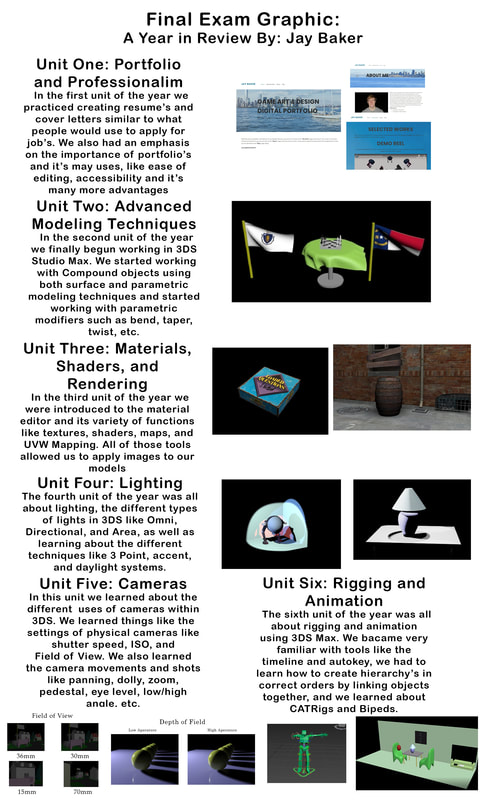 We accomplished a lot of things in this class this year but to me the most rewarding was animation. For me this was the most rewarding work that we did all year because it was the animations that we had to put most of our time into and once it was finally complete we could sit back and watch this amazing animation that we had put together and for me it felt like all my time had payed off. Some of the skills that I learned in this class that I will use in the future are definitely the animation skills, as well as the modeling techniques that we developed throughout the year. Overall for me this year in class was great, I can see the development of my work and I can see the improvement and I cannot wait to be in class next year with Mr. B to see what the next step of the journey will be!
Summary:
|
