|
As the school year comes to a close and we are right in the middle of exams I've been asked to reflect on my year in Digital Design and Animation 2. Overall my experience i this class this year has been great, we have learned so many interesting things in class this year not just about 3DS Max but skills that can be used for life. Some of my main takeaways this year have been, the importance of lights and cameras (I did an entire blog post on just that topic), animation, and learning new skills in 3DS like working with materials and different modifiers to make our models more realistic. Unit one was all about portfolio's and professionalism, we practiced creating resume’s and cover letters similar to what people would use to apply for job’s. We also focused on the importance of portfolio’s and it’s may uses, like ease of editing and accessibility. In unit two we begun working in 3DS Max and started with modeling techniques, for example compound objects using both surface and parametric modeling techniques and started working with parametric modifiers such as bend, taper, twist, etc. Materials, shaders, and rendering was the third unit of the year where we were introduced to the material editor and its functions like textures, shaders, maps, and UVW Mapping. Unit four was all about lighting, the different types of lights in 3DS like omni, Directional, and Area, as well as different techniques like 3 Point, accent, and daylight systems. Unit five was all cameras within 3DS. We learned things like the settings of physical cameras like shutter speed, ISO, and Field of View. We also learned the camera movements and shots like panning, dolly, eye level, low/high angle, etc. Unit six was primarily rigging and animation. We became very familiar with tools like the timeline and autokey, we had to learn how to create hierarchy's in correct orders by linking objects together, and we learned about CATRigs and Bipeds. Below is that summary with images from each unit. 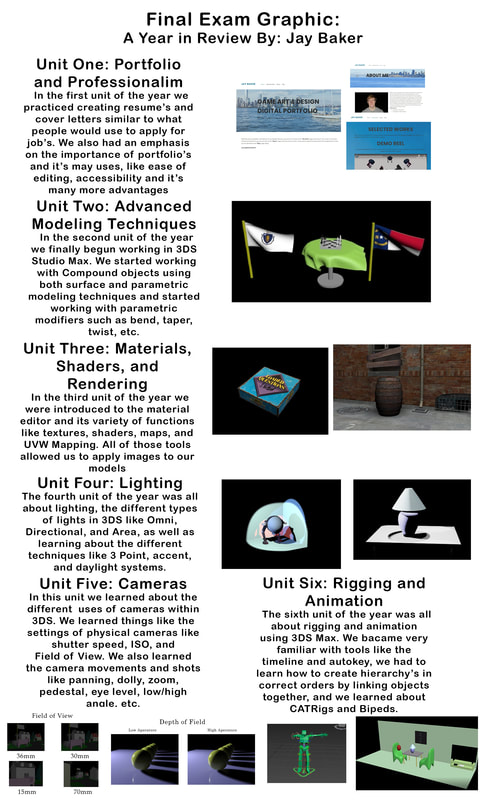 We accomplished a lot of things in this class this year but to me the most rewarding was animation. For me this was the most rewarding work that we did all year because it was the animations that we had to put most of our time into and once it was finally complete we could sit back and watch this amazing animation that we had put together and for me it felt like all my time had payed off. Some of the skills that I learned in this class that I will use in the future are definitely the animation skills, as well as the modeling techniques that we developed throughout the year. Overall for me this year in class was great, I can see the development of my work and I can see the improvement and I cannot wait to be in class next year with Mr. B to see what the next step of the journey will be!
Summary:
0 Comments
According to the Autodesk knowledge network, "The CATRig is the hierarchy that defines the CAT skeletal animation system. It is a fast, sophisticated yet flexible character rig that is designed to let you create the characters you want without having to write scripts." In basic terms this just means that 3DS has pre-made characters and models for people to use for animation and games, all they have to do is skin the character (3DS also has ore-skinned characters). I just recently started working with these rigs and so far my experience has been pretty positive, all of the pieces of the character are connected so moving the character for animations is very simple for users. This is all based through the hierarchy section which I touched on in my last post but if you didn't read it then here's the rundown, all of the objects were selected and linked together in a specific order so when the parent object is moved the childern objects automatically follow. 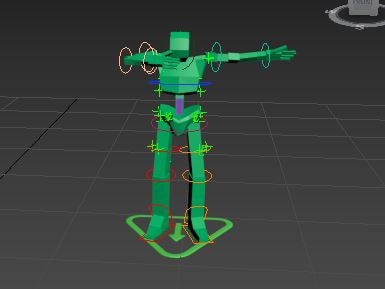 This was the Marine CATRig which had no textures and I just used the motion presets to make the rig look like it was dabbing. The whole process of creating the rig and moving it around was very simple thanks to how easy 3DS makes it for idiots like me to create cool models, 3DS provides simple bones and skeleton for users to adjust based on what they want their animation to look like. Overall CATRigs are probably one of the most important parts of games and I can't wait to work with them more in the future.
Summary:
Over the past couple of weeks in class, all of us students have had our heads down trying to get the final work for the quarter turned into Mr.B. All of this work that we have been doing has been focused around animation and rigging in 3DS Max. For me every class period I've had to work on these assignments have gone by like a blur because of all of the work that has to be done, I started out working on the bouncy ball project which was just to get users familiar with the curve editor and how it works alongside autokey and the timeline. We had to make an animation where the ball bounced off of three different objects as well as change directions three times. Overall I thought that the final product looked pretty good thanks to the stretch and squash that I applied to the ball before and after the frames where it would hit an object. This assignment did teach me how to work around the curve editor (as it was intended to) and it taught me some more things about the timeline and how to increase duration of the animation by working with the time configurator. The next assignment that I had to complete was simulating a game designers job, where I had to to rig a lamp for an animation, then without animating it submitting the assignment as if we were sending it to an animator. All I had to do for the project was create the dummy's that were used to move the object, apply the constraints to link the parts of the lamp together, and arrange the hierarchy so that the animators job would be as basic as just doing the keyframing. This assignment took me forever, I had to follow a written tutorial which to me is hard because I get off task very easily, and just learning the new things like constraints and figuring out the specific way that the objects had to be linked. But overall this may have been one of the most important assignments as it is simulating the real life work that game designers have to do and how they work with other people in the industry. Both of these two assignment have been very important in class teaching the basics of rigging and animations and I hope to continue work similar to this in the future.
Summary:
This quarter has felt like a complete rush in my eyes, it started out with the basics of lighting and cameras which was very small quick unit then continued on to become rigging and animations which is where the entire class is right now. When I started on the cameras and lighting unit I had been out of class for a week so I had a ton of work to catch up on so I had to put my head down and focus on the unit, overall the whole lights and cameras unit was very crucial to the basics of any game because without lights and cameras there wouldn't be any games for anyone to play (I did a previous post on the importance of lights and cameras in games). The final project of that unit was to create a demo reel of models that I have done this year and it had to be a camera moving around the model and it had to properly lit so you could demonstrate that you actually have learned something in the unit, below is the final product of my demo reel that I posted on YouTube. (Make sure to Like and Subscribe for more content like this :D) Once I was done with the lights and cameras unit it was time to move onto the final unit and most challenging unit of the year, rigging and animation in 3DS Max. Now I haven't gotten very far into the unit but I can already tell why students in higher levels of game design dread doing rigging but cause it is long and tedious. I'm on the the first assignment of the unit and I have already spent a couple of days on it (probably because I'm not very smart and get distracted easily), in the assignment we have to follow a written tutorial on learning to make a ball bounce like it does in real life primarily using the curve editor. This has been as I said a very long and tedious process because once I learned how to make the ball bounce I have to make it bounce around a room, hit three objects and change directions three different times. This has been very very challenging for me because working with the curve editor is not very easy for someone challenged like myself and it's not self-explanatory like most of the other things in 3DS. Hopefully soon this process will become second nature to me like other tool in 3DS Max but for right now it doesn't seem like it. Overall this quarter has felt like a blur and I definetly need to put my head back down and get to work on this rigging and animating.
Summary:
Roblox is a game as well as an entire experience. When I say this I mean its simply way more than a single game with a single storyline. Now when lots of people think of Roblox they think of memes and little kids playing on their computers, now I don't blame them because that is primarily the games reputation but recently I have found myself spending long nights up with my friends playing random games. Roblox was initially released in 2005 by Roblox Corporation and as time has moved on Robox has released games on multiple services such as XBOX and IOS. When people usually think of a game they think of levels and storylines that players have to follow, but this game is completely new. It is supported by the community meaning that players and companies can create their own levels and games for everyone to enjoy. This has been massive where there are games for everyone and it has been big for creators too, in a study from Duke in 2017, they estimate that creators have earned at least 30 million dollars collectively. They make this money from a free game by including in game purchases that aren't necessary to complete the games. Its massive success also led to toy line being released in January of 2017 by toy fabricators, Jazwares. Now I'm going to give you some reasons that I have really enjoyed playing this game, first off when searching for a random game to play with friends there are millions and millions of options for you to choose from. Another big reason is that once you or your friend have found a game that you want to play all you have to do is go to your friends list and select your friend, then just click join game. Now the game isn't perfect and you can tell, mainly with the user interface. If I were a little kid trying to find their friends list, I would definitely have some difficulties. As it is a simple interface there are many ad's and lots of different games on the home-screen which make it very crowded. These issues are very easily overcome with help from a parent or simply just contacting customer services. Overall Robolx really ignites my nostalgia and staying up late with some of my friends searching for a fun game has left me with a sweet-spot for this game.
Summary:
Recently in class we have began working with basic physical cameras and the standard lightning techniques and overall this has been one of the most important units that we have done so far. The reason that I say this unit is so important is because yo cannot have a professional looking game if the scenes aren't well lit even if it is a horror game some elements need to be well lit. Cameras may be even more important in some circumstances in games where it may be a cut scene are there are bigger elements in the back of the scene that the player needs to see like an incoming army or a ship that is flying in. One of my classmates, Nick says, "Cameras and Lights are very important in games so that players can see the characters and environment." Aidan, another one of my classmates said, "Lights and Cameras are super important in games to create the mood and tone of the level or stage." I agree with both of these statements very much as both of these are very important elements in games and necessary for a good user experience. 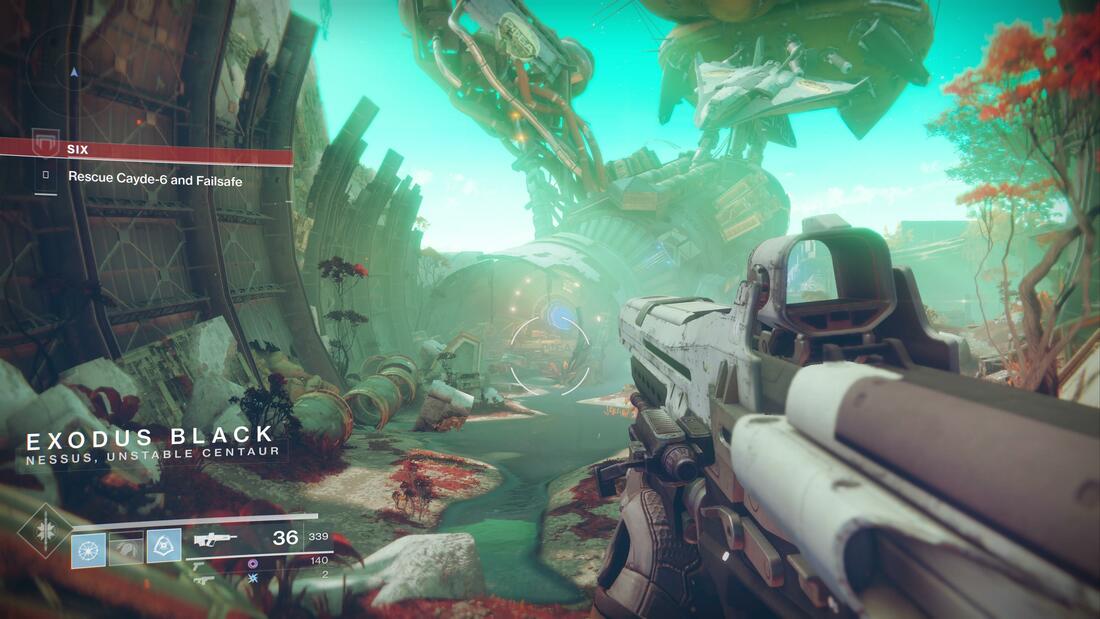 As seen in the image above the lights are playing a very pivotal role in this scene by creating an eerie tone and allowing players to clearly scene (Image from Destiny 2, Bungie, Forbes). The camera in this screenshot is playing an even bigger role by helping out the first person game-play by using a perspective camera. These are just some of the many reasons that game developers use lights and cameras to create the games we know and love.
Summary:
Over the past couple of weeks in class we have been introduced to UVW Mapping. According to Wikipedia, "UVW mapping is a mathematical technique for coordinate mapping. In computer graphics, it most commonly maps to map, in contrast to UV mapping, which maps to. The UVW mapping is suitable for painting an object's surface based on a solid texture." To me this means we are applying different Bitmaps to the objects as Standard/Sub-Object materials and making the model look like a real life object. The first assignment that we did using UVW Mapping was to create a box with Bitmaps that Mr.B gave us, this was actually quite tricky even though there was a tutorial for us to follow. The hardest part for me was using the different material editors, whether it was the slate material editor or the compact material editor, it was super confusing trying to preview the box. Another thing that was difficult for me was actually applying the images, because I first applied the UVW Map, then I would apply the Multi-Sub-Object material to it and delete some of the sides (because a box only has 6 sides), then I would have to figure out which side was which so I had to apply different colors to each side so I could differentiate them. After I had the sides figured out I had to name all of them, once I had them named and colored It was much easier. Once I had all of the sides prepared I had to apply a Standard material to each of the six sides on the box then apply the specific Bitmaps to each of the 6 Standard materials that I just applied. To me the most tricky part was changing and rotating the UVW's, sometimes when I applied the Bitmaps the Images would be turned or twisted and the image would be stretched, so I would have to adjust the settings by changing one of the U, V, or W settings, usually I would have to change the U settings to about 90, to flip the image. But after all of that was complete the box didn't look half bad, I looked like a box that I would see in a video game. To me the most interesting thing about UVW's was the ability to take your own pictures of objects and creating the object within 3DS Max. Overall UVW's seem very cool even though I haven't dove into the too much, but I sure am excited to!
Summary:
In 2018 I learned so much about 3D modeling. From things like using Blob Mesh to the uses of the Lathe modifier there were so many different tools and techniques that I learned both in class and on my own time. Lots of these techniques are things that I use even today, for example I was making a brick wall and to make it even I used the Array modifier to make it look like an actual brick wall. Another example of using a technique that I learned this past year was when I was making a fountain so I traced out the shape I liked, then applied the Lathe modifier, even then after that I used the Spherify modifier to make the fountain smooth. One of my favorite tools or modifiers that we have learned about is the TurboSmooth modifiers. TurboSmooth is a modifier that changes the amounts of faces on a primitive which make the object look more smooth when you render it. The first time that it peaked my interest was when we were creating a robot in 3DS and I randomly applied it to see what it would look like and I looked like an alien walker that looked super cool. This year has been the best modeling year of my life and I cannot wait to see where this takes me this year!
Summary:
This week in class we started to learn how to create simulations in 3DS Max. Our first assignment using simulations was to create a flag that was blowing in the wind, the first step was to create a flag poll by making a cylinder. Then we made a plane that was used as the flag, but to make the flag look realistic we had to put a bunch of segments in the plane. Then we applied the cloth modifier to the plane to give it the flowing effect. After that we had to create a group of vertices that wouldn't move, so we selected the group next to the poll and clicked preserve. After this we changed the Object Properties to silk and added the cylinder, so if the flag fell it wouldn't go through the poll. Then it was time to add wind, so we went to Space Warps, the forces and the selected wind. Once we set the direction of the wind we went back to the cloth and clicked cloth forces and selected the wind. Then once he click simulate local we got to see almost what the final product would look like. After we changed it by adding a Gravity force and changing the end frame by setting it to 100, once you click simulate it will create the video, then our first simulation was complete. This was one of the most fun topics that we looked at so far this year and I hope to continue working with simulations.
Summary:
This year in class we have been primarily focused on the more freeform method of modeling which is surface modeling and recently we have been introduced to parametric modeling where you use numbers to adjust the settings of the primitive to what you want. Even though you can be so much more precise with your models using parametric modeling I personally prefer using surface modeling, because of being able to convert the object to and Editable Poly which allows you to do so much more than if you were using parametric modeling. There are still instances where using parametric modeling would be better to use than surface, for example if you were trying to make a model of a house and it needed fit fit exact measurements parametric modeling would be the best technique for that job. However if the size of the house didn't matter for the project than I personally would have used surface modeling techniques.  This is an image of a nested dodecahedron that I modeled using parametric modeling techniques where I changed the size of the holes in the different dodecahedrons. Overall both of these modeling techniques are useful for different projects but maybe size does matter for it so you would use parametric modeling but in other projects maybe surface modeling may be the way to go.
Summary:
|
